The 10 Best Survival Fire Starters

This wiki has been updated 39 times since it was first published in October of 2015. If you're ever stuck out in the wild, getting a fire going can be the difference between life and death. These survival fire starters can help you generate a flame in even the most unforgiving of conditions, allowing you to quickly get warm and dry. Some also feature other useful gear, like compasses and whistles, and all are easy to carry along in your bag or pocket. When users buy our independently chosen editorial recommendations, we may earn commissions to help fund the Wiki.
Editor's Notes
March 30, 2021:
When it comes to bushcraft fire starting tools, there are several different methods available. A simple flint and steel, as commonly found in most cigarette lighters, is effective, however, it needs to be kept dry, making it the least suitable for outdoor survival purposes. A ferrocerium rod is used to create sparks and is struck repeatedly with the supplied striker or with the back of a knife. While the rod will function just fine when it is wet, the tinder needs to be dry in order for it to catch fire. Finally, a magnesium bar is used as the tinder and will ignite in the worst of conditions. Fine shavings of magnesium are piled up then ignited using a ferro bar. This method is the best for igniting damp materials, however, it does require carrying more equipment.
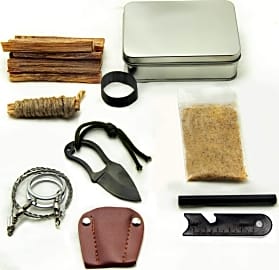
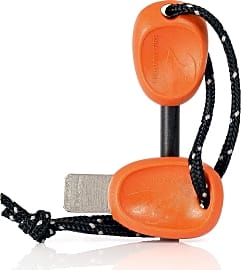
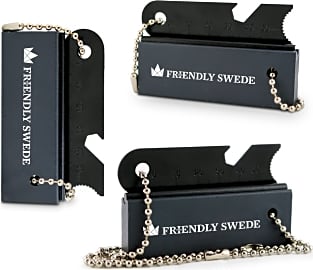
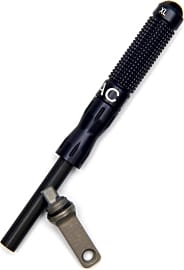
In this update, we made sure that each of our recommendations were still suitable choices, and replaced any which were deemed to be underperforming. If you decide to go with the ferrocerium bar method, the size of the bar is of primary concern. Small bars such as the Light My Fire Swedish FireSteel 2.0 and the Exotac nanoStriker XL, are compact, easy to stash, and a good choice for unexpected or emergency situations. However, they are more difficult to grip, especially with cold hands. Larger bars, such as the Bayite Ferrocerium Rod, are easier to use and will last much longer, making them a better choice if this is your only means of generating fire. If you are concerned about problems with finding dry tinder or fuel, The Friendly Swede Mag Bar will ensure a flame, and has a ferro bar built into the top for igniting the magnesium shavings. For true peace of mind, we included the Kaeser Wilderness Supply Survival Tin, which comes with several grades of tinder in waterproof packets, ensuring that even in the most inclement weather, you'll always have fuel to get the fire going.
March 08, 2020:
A fire starter can be a crucial tool in a time of need, so we've looked for options that can be counted on. That's why we've opted to remove the Überleben Zünden Bushcraft; the main rod tends to separate from the handle, which is annoying at best — and dangerous at worst. It's also important to note that no matter which option you select, you'll want to practice with it before you actually find yourself in a survival situation; there's a bit of a learning curve to using a ferro rod competently. In fact, it's for this reason that we've decided to add the Zippo EFK for those who want a familiar lighter-like experience. The entire kit floats, so you don't need to worry about it getting wet, and you can clip it to your pack easily thanks to the lanyard hole.
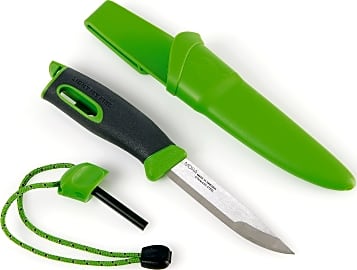
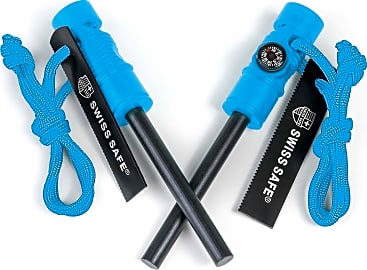
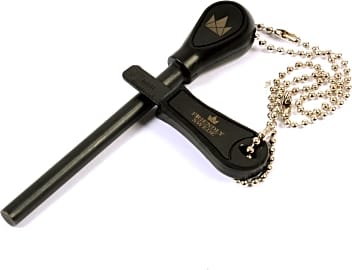
For those who do want a rod, we have kept the popular Bayite Ferrocerium Rod as a top choice. It doesn't arrive with a striker, but it isn't too expensive and strikers are available for separate purchase. For an all-in-one choice, there's The Friendly Swede Easy Grip or the Light My Fire Swedish FireSteel 2.0. They throw a decent amount of sparks and are compact enough to take virtually anywhere. For multipurpose options, there's the Swiss Safe 5-in-1 or the Light My Fire FireKnife. The former has a compass built-in, although it's quite small and should be considered more of a backup than a main unit. As to the latter, it is indeed a survival knife with a fire starter right in the handle. It comes in several bright colors but costs more than simpler choices.
Special Honors
Lightning Strike Standard The Lightning Strike Standard is easily more expensive than nearly any other option, but it's also bigger than most; in fact, it can hold enough tinder for up to 20 fires and even has a replaceable flint. It comes in several colors, too, in case you want your survival gear to be color-coordinated. lightningstrikefirestarter.com
FireSteel GobSpark Ranger Kit The FireSteel GobSpark Ranger Kit is aptly named because it produces "gobs of sparks," which is more than enough to have you warm and toasty in no time. Each is strung on a lanyard and designed to be easy to hold in the hand, and when you're finished with it, you can store it in the handy included tin. firesteel.com
Garrett Wade Copper Tinder Box It may not be cheap, but the Garrett Wade Copper Tinder Box is quite handsome thanks to the sleek copper-colored holder. Inside, you'll find char cloth, jute strands, flint, and a striking steel — everything you need to bring a fire to life. There's a magnifying lens, too, for starting a fire on a sunny day. garrettwade.com
A Brief History Of Starting Fires
However, many survivalist fire tools rely on the same principles that our ancestors used.
The rise of human civilization is tied to our ability to control fire. If our ancestors hadn't tamed the mighty flame, we would never have been able to expand to the far corners of the earth, our diets would have been much more restricted, and s'mores would remain a distant, impossible dream.
Using a flint blade to create sparks first happened about 300,000 years ago. This was a watershed moment in human history, as it meant that for the first time, humans could have fire on demand, without waiting on nature to first provide it. This opened up the ability of exploration and colonization, as they could now survive in colder climates while also warding off nocturnal predators.
The first evidence of man using friction to spark combustion came 4,000 years ago in ancient Egypt. This technique involved rubbing pieces of wood together, either by using some sort of plough or relying on a bow or saw.
With the dawn of the Iron Age around 1200 B.C.E., humans developed special tools known as fire strikers. These were pieces of steel that were struck against flint or iron pyrite, creating extremely hot sparks. Fire steels would prove remarkably durable, as they would continue to be the dominant mode of fire-starting until the 19th century. Most households would have a tinder box, which contained a fire steel, flint, and char cloth.
German chemist Hennig Brand discovered that phosphorus was flammable in 1669, and from there the race was on to harness its power. The first friction match, however, wouldn't come along until 1826, thanks to English chemist John Walker.
Today, we have a variety of fire starting devices, including matches, lighters, and magnifying glasses. However, many survivalist fire tools rely on the same principles that our ancestors used. We still try to start blazes by applying sparks to flammable substances — and in all too many cases, our survival still hinges on our success.
The only difference, really, is we've found a much better use for Tinder.
How to Choose the Right Survival Fire Starter
Let's face it — if you're Bear Grylls, you don't need to buy a fancy fire starter. You can make your own roaring blaze using nothing more than two sticks, your own breath, and a cup of your own urine (don't ask what he uses that for).
However, you're not Bear Grylls, and it's important to remember that. No, I'm not putting down your survival skills — I'm simply pointing out that he has a camera crew with him that will whisk him away to safety if he can't get a fire started. If you can't get a blaze going, however, you could die. There's no point in risking your safety just so you can feel like a guy you saw on TV.
Again, your life could depend on this, so get something you know you can use, and take the time to practice with it before you go into the great outdoors.
The first thing you need to realize is that you should never limit yourself to just one way to start a fire. Things happen when you're outdoors — you could lose your flint, your tinder could get soaked, or maybe your matches just won't cooperate. That's why it's good to have several different fire starters on hand. I'd recommend getting a couple professional methods, while also keeping matches and a regular lighter on hand in a waterproof container.
If you carry a lot of gear, you'll want a starter that's extremely lightweight. Some also come with other devices installed, like a compass, which can allow you to further streamline your pack. However, be careful about getting too small, as you don't want one that will be easy to lose out in the brush.
You also need to decide whether you want to get something cheap that you'll have to replace often, or splurge for a longer-lasting option. There's no real wrong answer here; again, it comes down to whether you're the type who tends to misplace gear, or if you keep the same items your entire life.
The most important consideration, however, is whether or not you're comfortable with it. Again, your life could depend on this, so get something you know you can use, and take the time to practice with it before you go into the great outdoors.
And if you see Bear Grylls while you're out there, hit him up — he probably knows where to find a great hotel in the area.
Tips For Starting A Fire
Once you've found a reliable method for creating sparks, all you need is fuel to burn. The best way is to bring your own tinder, such as fire paste, cotton balls soaked in petroleum jelly, or even dryer lint. If you don't have anything with you, however, look for dry kindling, or if it's raining, see if you can find some sap on any nearby needle-bearing trees. If you're using sticks, be sure to peel the bark off before burning them.
When you're ready to light it up, arrange all your kindling in a pile. Remember that heat rises, so you'll want to build your pile in a tee-pee shape. Don't try to just lay everything in a flat pile, because then your fire will quickly burn out, if it catches at all. Start the fire from the windward side, as this allows air to travel through your embers, keeping them alive and the fire crackling.
After you're done with your fire, be sure to put it out. Take a fire extinguisher with you, and never leave until all the embers are cool to the touch. If you love to camp, the last thing you'll want is to find out you can't go to your favorite spot because you accidentally burned it down the last time you were there.


