The 10 Best Jumper Cables

This wiki has been updated 44 times since it was first published in April of 2015. Never get stranded with a dead battery again, or be the good Samaritan for someone else, with a set of these high-quality jumper cables. Our selections for this category include budget models for occasional emergency use on small vehicles, and heavy-duty ones capable of the most demanding applications, such as regularly jumping farm equipment or boosting big rig trucks. When users buy our independently chosen editorial selections, we may earn commissions to help fund the Wiki.
Editor's Notes
April 29, 2021:
We found this list to still be in good shape, containing a well-balanced selection of heavy-duty models that are suitable for use with equipment of the same build, and medium-duty models that are practical for your average commuter looking to flesh out their roadside emergency kit. As such, we left things as they were, and moved through this update without making any major changes.
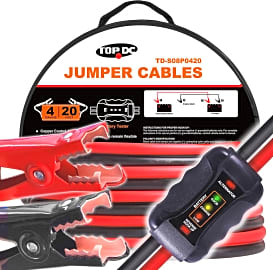
In fact, because the last editor for this page seems to have deliberately ordered these selections according to their gauge size – which we felt would be helpful for our users – we were loathed to even upset the ordering of our selections, although we did give the TopDC Smart Booster TD-S08P0420 a one-spot boost, because we thought that its indicator LEDs would be a welcome convenience for many.
For other solutions to help you stay on top of your batteries, you might also be interested in our lists of solar battery maintainers and jump starters.
April 02, 2020:
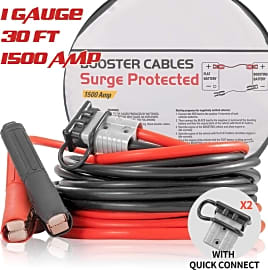
During this round of updates, while our previous selections still proved to be relevant, we did decide to remove the Cal-Hawk CBC25 and EPAuto AA-003-1, noting that our rankings already included similar offerings at better prices, and wanting to make room for a couple of new additions. Our new inclusions are the Topdc Smart Booster TD-S08P0420 – which has a built-in tester that lets you know when your battery is sufficiently boosted, and the FieryRed Heavy Duty Booster – a two-piece model that hooks up via quick connector, so you can attach the short end, which is outfitted with copper terminal lugs, permanently to the winch on the front of your truck, and your friends can plug themselves into it the next time they get stuck off-roading.
A few things to think about for this category:
Wire Size and Ampacity: Every wire has a predetermined ampacity rating that describes how much current the wire can handle. Current ratings are based on three things: the size of a wire, the type of material it’s made of and the quality of its insulation.
Wire Size: For the most part, bigger is better. A #6-AWG or six-gauge wire is bigger than a #8-AWG or eight-gauge wire, just as #4-AWG is bigger than #6-AWG, and #2-AWG is bigger than #4-AWG, and so on. Once you get lower than zero, the system changes a bit, but for the purposes of jumper cables we really don’t need to worry about that. Just remember that a lower number means a bigger size, and thus more current, and thereby a quicker boost. However, cables with larger wires are also more expensive, less flexible and more bothersome to store – so there’s something to be said for not going too big.
Wire Material: For the most part, electrical conductors tend to be made of either aluminum or copper. There are other materials, like silver, that would be suitable, but this tends to be cost prohibitive. While copper is considerably more conductive than aluminum, it’s also considerably more expensive, and considerably less pliable.
So, for example, according to the National Electrical Code, a #4-AWG copper conductor is rated for 95 amps at 90 Fahrenheit. If you wanted to substitute aluminum for this wire, you’d need to select a #2-AWG aluminum conductor, which is rated for 100 amps at the same temperature. Even though the #2-AWG conductor is significantly larger than the #4-AWG conductor, the aluminum alternative will not only be more affordable, but more flexible. For the purposes of jumper cables, copper-clad aluminum is typically the material of choice, which is a hybrid of the two that offers much of aluminum’s favorable flexibility, and much of copper’s superior ampacity. Although this isn’t an absolute standard, it’s so common that if it isn’t otherwise stated, you can safely assume the conductors are copper-clad aluminum.
There are pure-copper cables, but they’re sold at a premium and tend to be less pliable than their copper-clad alternatives. For example, we ranked the Performance Tool W1673 – a 20-foot, copper-clad model – but the company’s W1667 model – which is also 20 feet long, but made of pure copper – is available for more than double the price.
And, as a final thought on this matter: All jumper cables, to the best of my knowledge, are stranded, but when comparing two like-sized cables, the one with more strands will be more flexible.
Wire Insulation: You’ve got two cables you’re comparing side-by-side. They’re both 20 feet long, they’re both four-gauge and they’re both made of copper-clad aluminum. So, why do they have different ampacity ratings? The last piece of this puzzle is the wire’s insulation. Ampacity ratings are all about how much heat a conductor can safely dissipate, so in an apples-to-apples situation like this, the superior ampacity rating is owed to superior insulation. How much ampacity you realistically need depends on what you plan on boosting.
Clamps: While most of our selections have fully-insulated clamps for maximum safety, perhaps with exception of the Allstart 564, their jaw designs vary throughout, and some lend themselves to making better contact with battery terminals. Better contact means better continuity, which in turn means more current flow and quicker boosts. The Cartman BC0420K have a patented jaw design with a “tongue” down the middle that allows for a third point of contact on both sides of the clamps, and the Performance Tool W1673 have an extended, concave jaw that’ll wrap right around your terminal poles.
Length: Ten feet might be an ample length for boosting another vehicle if you’re parked head to head, but seldom is that a practical option. For this reason, most offerings are in the neighborhood of 20 feet long, but some – like the 30-foot FieryRed Heavy Duty Booster – go a step further. While 20 feet is probably a sufficient length for most users, a longer offering won’t do any harm, besides perhaps to your wallet and trunk’s cargo space, so don’t be afraid to go big, if that’s your inclination.
Of course, you wouldn't need these booster cables at all, if you kept one of these jump starters handy.
Getting a Jump On Things: Buying Jumper Cables
If your vehicle has its battery placed in an unusual spot, near the rear or set deep into the engine compartment, you'll require longer cables for a safe, clean connection.
If you don't have a pair of jumper cables in your car, you are inviting inconvenience into your life. While the average car battery lifespan is five years, many fail in much less time than that. And even a perfectly viable battery can drain in a matter of hours when you inadvertently leave on the headlights or a dome light. And should the car battery die when you most need your vehicle, like when you have a critical appointment to keep or even when an emergency necessitates sudden travel, a drained battery can be worse than inconvenient, it can be a disaster.
While it's fine to think of jumper cables as more of an insurance item -- e.g., something wise to have even if seldom used -- than a tool you will need in daily life, making the modest investment in a pair of decent cables is only wise. As you might expect, paying more will generally ensure you wind up with a high-quality pair that can last for a decade or more, and can jump a range of vehicle types from a little four cylinder Honda Civic to a heavy-duty Ford 3500 pick-up truck. If you use them but once in all the years you drive a car, they will generally have paid for themselves as calling for a tow or other roadside assistance is very costly.
If you are going to purchase lower-end jumper cables, then you will almost surely be considering options designed only for use with standard 12-volt automotive batteries and smaller engines. One of the main things to consider on this end of the scale is the length of the cable. If your car or truck has its battery placed to one side of the engine block and is easily accessible when the hood is raised, as is common with most cars, then it will be easy to locate and connect to the the battery terminals with a shorter pair of cables.
If your vehicle has its battery placed in an unusual spot, near the rear or set deep into the engine compartment, you'll require longer cables for a safe, clean connection. Jumper cables commonly measure 12-feet in length; surprisingly, these might fall short in many scenarios, especially if you are trying to connect two large vehicles (heavy duty pickup trucks, for example) or cars with unusual battery placement as already noted.
More expensive, heavy-duty cables, such as those rated 6 gauge or less, can be expected to work both with 12- and 24-volt batteries and to be safe for 500 amp loads and higher. These are usually suitable for automobiles as well as for heavy machinery that you might find on a farm or construction site. Look for special features such as glow-in-the-dark handles, non-kinking flexible rubber coatings, and lengths of up to 25 feet.
The Basic Steps of Jump Starting a Car
A car with an effectively dead battery may fail to give any indication of power, or it might create a repetitive clicking sound when you try the ignition. Once you have established that your car's battery is dead or so low on charge that it cannot start your vehicle, stop trying to turn it on to reduce the risk of damaging the car's electrical system.
Unlike when connecting the positive wire, you connect the negative wire to the car doing the jumping first.
The first step to jump starting a car is to position the afflicted vehicle and the car or truck providing the jump close enough that your cables can easily span the distance between the two batteries. Make sure the vehicles are not touching, are turned off with keys removed, and have their parking brakes set.
Next, make sure you can clearly identify the positive and negative terminals on both batteries and that they are clean and free of obstructions. Once you are ready to connect the cables, ensure the clamps cannot accidentally touch each other and start by connecting the red/positive cable to the drained battery's positive terminal (marked with a +), then the other positive clamp to the charge source. Next connect the black/negative cable to the powered car's negative battery terminals (shown with a -). Unlike when connecting the positive wire, you connect the negative wire to the car doing the jumping first. On the car being jumped (the one with the dead battery) the negative cable clamp should be attached directly to an exposed metal section of the frame, not the battery. This eliminates the risk of potentially igniting the battery from sparks or causing it to explode.
Now, turn on the functioning car, pause for a full minute, then switch on the afflicted vehicle. As soon as the second car has started, you may disconnect the cables, starting with the negative clamps first.
From this point on, the vehicle's running engine will charge its own battery assuming the alternator is functioning properly and the battery is still capable of holding a charge. Make sure you leave the afflicted vehicle running for 15-20 minutes before turning it back off, as your battery will teed time to rejuvenate itself.
Other Jump Starting Accessories to Consider
Along with a set of jumper cables, at the bare minimum your car's roadside preparedness kit should include all the tools and supplies needed to change a tire, a supply of water, and a source of light. (A headlamp is far and away the most useful device for illumination in this context.) Also, consider keeping a car escape tool close at hand, ideally in the glove box or center console.
As for the gear that can help to make the jump starting process safer and less of a hassle, some simple supplies will serve you well if ever needed.
As for the gear that can help to make the jump starting process safer and less of a hassle, some simple supplies will serve you well if ever needed. First, consider keeping a pair of work gloves in your car, with electrician's gloves being a particularly savvy choice, as they can reduce the chance of electric shock. Also, stock a clean rag and a solvent solution, such as isopropyl alcohol -- these will help clean battery terminals.
A large umbrella or plastic tarp that can be draped over the hood of a vehicle are both a good idea for use when dealing with a car battery during rainfall or snow. Also, beware of puddles of water on the ground in these conditions.
And finally, make sure you establish a highly visible working area while jumping a car. This means using the flashers of the car with the working battery, but also the deployment of cones, reflectors, and potentially even road flares. All of these items are affordable and, when used effectively as safety gear, priceless.


