The 10 Best Drywall Sanders

This wiki has been updated 34 times since it was first published in March of 2017. Whether you're a professional contractor or a DIY homeowner looking to spruce up the walls and ceilings in various rooms and hallways, one of these efficient drywall sanders will help you do the job. With powerful motors, adjustable lengths, and handy vacuum hose attachments, they're suitable for a variety of projects — just be careful not to breathe in any drywall dust. When users buy our independently chosen editorial selections, we may earn commissions to help fund the Wiki.
Editor's Notes
October 05, 2020:
In many cases, it appears that the Aleko DP-3000 dies after only a few uses, or even on its first project. We decided to remove it from the list. In assessing the Goplus Handheld, we noted that it can be difficult to maneuver into hard-to-reach areas (like corners or narrow spaces) because of the way its handle is designed. We pointed this out in the listing.
We also made sure to mention that the Festool Planex LHS 225 offers impressive maneuverability, allowing you to get into tight areas that some other models would have trouble managing. Another advantage to this sander: its strong suction tends to ease some of the burden of its weight from your arms, which helps push off the onset of fatigue.
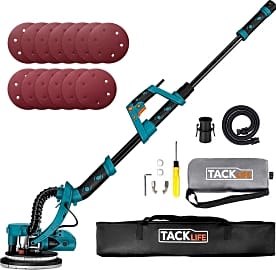
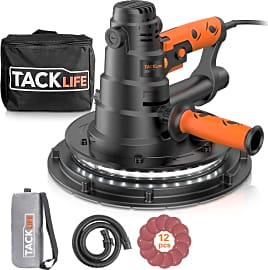
We added two items from the same manufacturer — the Tacklife PDS03B and Tacklife PDS03AS - both low-cost options that should perform well enough for a variety of do-it-yourself projects. The handheld PDS03B has a comfortable auxiliary handle that provides the user with precise control, which is helpful for jobs that require attention to detail.
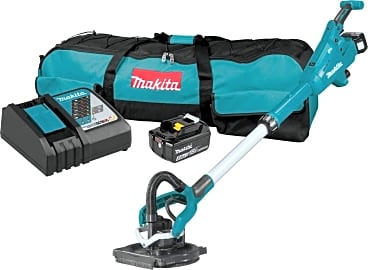
The Makita XLS01T is our other new addition; it’s a comprehensive kit that includes a battery, charger, backing pad, and even a large contractor’s tool bag. It has a powerful, efficient motor that should remain cool through most jobs.
June 04, 2019:
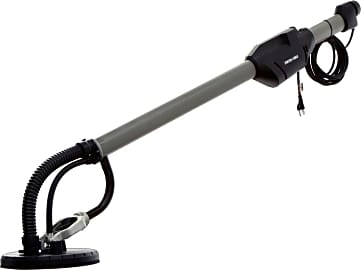
Traditionally, sanding drywall was a laborious and messy job. Luckily, with one of the handy units on this list, that doesn't have to be the case. The majority are electric powered, so they don't require too much effort on your part, and either have their own suction or are designed to hook up to shop vacs, meaning less clean up after you finish the job. The Festool Planex LHS 225, our number one choice, is without a doubt the best option for professional contractors. Anybody who has ever had a tool from this company knows they are extremely well-made and perform their intended task flawlessly. Unfortunately, the price will generally put it out of reach for the average consumer and even some contractors. If you feel you need a commercial-quality tool because you plan on handling some big jobs, but can't afford the Festool Planex LHS 225, the Porter-Cable 7800 will be a suitable second choice for most.
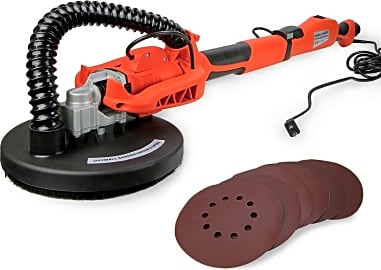
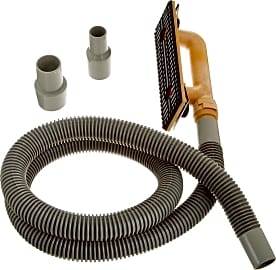
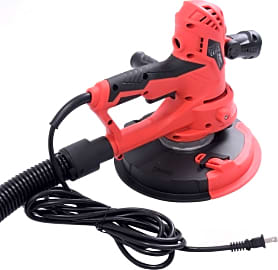
Now, for the home DIYers, we have a lot of different models to choose from. If you only have to sand a small area, the Hyde Tools 09165 might be all you need. Be aware though, it is a manual model, so all of the sanding power will need to come from you arms. On the plus side, it does attach to shop vacs for dust extraction. For most users though, the Goplus Handheld will be a better choice for small areas. Like the Hyde Tools 09165, the Goplus Handheld also doesn't attach to a pole of any sort, which gives you the utmost control. Unlike the Hyde Tools 09165 though, this is a powered model, allowing for fast and efficient work.
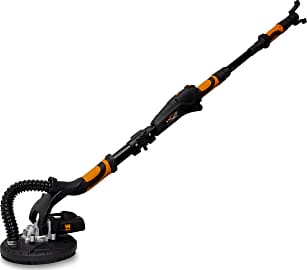
The Wen 6369, XtremepowerUS 61092, Aleko DP-3000, and GoPlus 11AA are all similarly priced, being within $50 of each other, but each model offers its own benefits. Of these four, we feel the Wen 6369 is the best built, and it has a smoothly-articulating head. Plus, it folds up for storage. However, the XtremepowerUS 61092 features a telescoping handle, allowing for more versatile work, and the Aleko DP-3000 comes with its own dust bag, so you won't need to own a shop vac, though its suction isn't very powerful. The GoPlus 11AA also features a telescoping handle, and it offers six speed settings. On the downside, it is rather heavy and may get cumbersome if doing ceiling work.
Special Honors
Power-Vac / Smartstick Combo This sanding system is pricey, but professional contractors will likely find that it’s a worthwhile investment. The dust extraction function is self-contained, meaning you won’t need a vacuum hose attached to a separate dust extractor. As a result, it’s easier to maneuver than most traditional models, allowing you to get through jobs efficiently. herbertdrywalltools.com
Mirka Leros A lightweight sander with a flexible rotating head, the Leros doesn’t require a ton of effort to operate, and it’s constructed to sand very close to corners and edges with precision. It also connects via Bluetooth to the myMirka app, which can track performance information like vibration and speed. mirka.com
Choosing Your Drywall Sander
Since they keep you a bit further away from the sanding action, they can also help cut down on any the chances of you inhaling some of the dust.
Any handyman or contractor can tell you, having the right tool for the job makes all the difference. If you use the wrong tool, the job will suffer, either in efficiency or an inferior end result. If you have determined that you need to do some drywall sanding, it is important to understand the different tools available to you, so that you can ensure that you do, in fact, have the right tool for the job. We can break drywall sanders down into a two main categories: manual and powered.
For most people, a manual drywall sander is definitely not the right tool to tackle the whole job. Unless you are sanding a very small surface area, using just a manual model will be grueling, time consuming, and downright inefficient. Of course, if you don't ever plan on sanding drywall ever again, and you just need to smooth out few small seams before painting, you may not want to, or need to, spend the extra money on purchasing a powered model. If you fall into this category, it is still a smart idea to buy a manual model that features a hose and connects to a shop vac, units commonly referred to as dustless sanders. Otherwise, you'll soon find that every item in the vicinity that isn't covered with a tarp, yourself included, is covered with drywall dust. Ideally a manual model should be used in conjunction with a powered sander.
Powered drywall sanders work very similarly to traditional orbital sanders. They feature a round pad that spins at anywhere from 350 to 3,000 revolutions per minute, and sometimes even faster. One of the most notable differences between these two tools, other than drywall sanders often having a larger sanding disc, is that you'll almost never find a sander intended for drywall use that doesn't have an integrated vacuum hose, whereas there are many traditional orbital sanders that don't have this feature. This is because drywall creates an exorbitant amount of dust when sanded, and there are many dangers associated with inhaling it.
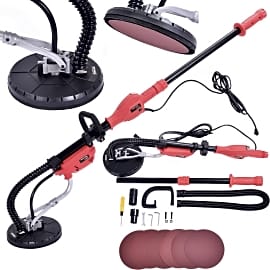
Powered drywall sanders can be further broken down into two sub-categories: handheld and pole-mounted. It doesn't take a rocket scientist to figure out that pole-mounted options allow operators a greater reach. If you plan on doing a lot of sanding on the ceiling or high up on walls, a pole-mounted option will be your best bet. Since they keep you a bit further away from the sanding action, they can also help cut down on any the chances of you inhaling some of the dust. The addition of the pole does make the tool heavier, however. So, if you are tall enough to reach all of the areas you plan on sanding, a lightweight handheld model may just the thing.
For the contractors and DIYers out there who want the best of both worlds, there are convertible models that allow for both handheld and pole-mounted use.
What To Know Before You Get Started
While we touched on it briefly in the first section, we would be remiss if we didn't point it out again, and again, and again. Drywall sanding is messy — very messy. Even if you are using a dustless drywall sander, the fine, flour-like drywall dust will still find a way to escape and blanket everything in the house. For this reason, it is very important to prepare the work area before you start. Lay dropcloths over any surfaces or furniture that you cannot remove and seal off any air-return ducts to prevent the dust from spreading to other areas of the home or clogging your AC filter. You should also open the windows for ventilation and position a box fan in some of them to suck the air out. Make sure to remove the screens too, otherwise you will wind up having to clean them.
It is vital to use the proper safety equipment when drywall sanding, as well. This includes a two-strap dust mask or respirator. Make sure to change your dust mask or the filters in your respirator often. Depending on whether or not the room is properly ventilated and if you are using a dustless sander, this may be as often as every 30 minutes or as rarely as every six hours. You should also wear safety goggles or glasses to protect your eyes. Since drywall dust can irritate the skin as well, it is not a bad idea to wear long pants and a long sleeve T-shirt.
A Few Helpful Tips To Ensure A Professional-Looking Result
There is no doubt about it, drywall sanding is one of the worst jobs in construction. It is laborious, dirty, and worst of all, very easy to screw up. It's the last chance you have to prepare the foundation correctly. Either you have succeeded in making all of the fasteners and seams look uniformly invisible, or you haven't. Once you move onto the painting stage, the truth will be revealed, and glaringly apparent forevermore.
The dings, pits, and sanded-through areas you should touch up with joint compound before resanding them, either manually or with your powered sander.
Despite how tempting it may be to use a low-grit sandpaper in the hopes of speeding up the job, this is a definite no-no. Using coarse-grit sand paper will result in unsightly sanding marks in the finished surface. Somewhere between 120 and 300 grit will give the best results, depending on if you are using a powered or manual sander.
If you find that there are a lot of grooves or large ridges in your work, don't waste a ton of time trying to sand them out. Instead, touch them up with another coat of joint compound. Not only is this quicker and easier, it may also prevent you from sanding so much that you end up damaging the drywall's paper face.
After you have finished your initial sanding, shine a bright light parallel to the wall. This will help you spot any pits, sanded-through or uneven areas, and dings. Circle any problems as you find them. You can then use your manual sander to to smooth out any uneven surfaces. The dings, pits, and sanded-through areas you should touch up with joint compound before resanding them, either manually or with your powered sander.


