The 10 Best Cream Whippers

This wiki has been updated 38 times since it was first published in July of 2015. When you have the urge to whip it good – cream, that is – save your wrists the trouble and allow the power of chemistry to do the work for you with one of these whipped cream makers. They'll have you dispensing light and fluffy concoctions with a simple press of a lever, and eliminate the need to rely on those store-bought cans that often contain chemicals and preservatives. When users buy our independently chosen editorial recommendations, we may earn commissions to help fund the Wiki.
Editor's Notes
July 09, 2019:
If you're buying a whipped cream maker, then you likely fall into one of two categories: you want to make professional-level treats at home, or you work in the food industry and your customers demand flawless fluffy toppings on their baked goods, frappuccinos, and the like. We rounded up some dispensers that are high-quality enough for the commercial kitchens, and make DIYers — who have perhaps been using the more traditional kitchen mixers until now — step up their game and feel like pros.
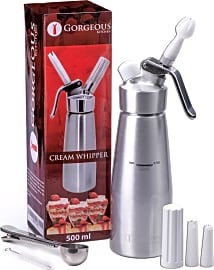
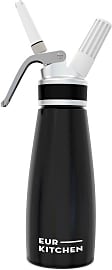
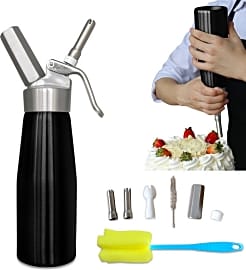
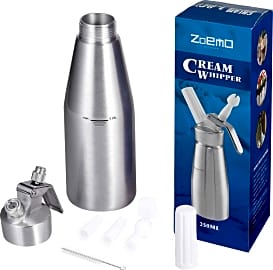
Bakers and those just wanting to add a little hidden surprise to their pastries will appreciate that the Otis Classic Commercial has four injector tips for getting that cream inside of those profiteroles. If presentation is everything to you, then you'll also like the seven interchangeable tips that come with this tool, allowing you to create different designs with your cream. If you need to feed a large party or keep up with the demands of a commercial kitchen, the iSi 173001, which can take a quart of ingredients, will come in handy. No matter the settings, there are some features any culinary master can benefit from, like the rubber band for the head on the EurKitchen Whip-18 for a non-slip grip, or the dishwasher-friendly parts of the iSi 160301. If you're new to making whipped cream at home, you'll like that the Zoemo AL250 comes with a recipe e-book and the AmazeChef Dispenser has a recipe written on the box.
History Of Whipped Cream and Cream Whippers
He most certainly created the dish before 1549, as he died in 1548 and the book was published posthumously.
It is not known exactly when the first whipped cream was made. There are various wives' tales that all tell of a different way by which it was discovered. A popular one says that a person living in a cool climate was making butter, but in their hastes to finish the task accidentally whipped the milk instead of churning it and the result was whipped cream. Another story includes a half-filled container of cream and a fast horse ride.
While one or none of these tales may be true, the first definitive reference to this culinary delight comes from a 1549 recipe by Cristoforo di Messisbugo, a cook and steward of the House of Este in Ferrara, Italy. He most certainly created the dish before 1549, as he died in 1548 and the book was published posthumously.
Another Italian chef, Bartolomeo Scappi, also had recipes which include whipped cream in the late 1500s. There is also a recipe found in "A Proper newe Booke of Cokerye" from 16th century England for "A Dyschefull of Snow," which requires the whipping of a combination of egg whites, and cream flavored with sugar and rosewater.
In the 1930s, a British scientist developed an aeration system for use in the industrial food industry to instantly create whipped dairy products. N20 was used because it fully immerses into foods without affecting the flavor and does not cause oxidation. Hand held units for home use were developed not long after and enjoyed and brief period of popularity.
In the 1950s, single use cans of whipped cream were introduced to the market, which caused a decline in whipped cream charger cartridges for home use and for a time they were mostly found in restaurants. As we have become a more socially aware country, home whipped cream charges have enjoyed a steady comeback as a way to reduce waste. The growing legions of culinary advanced home chefs have also found unique ways to use them to enhance a range of dishes with foams and espumas.
How To Use A Cream Whipper
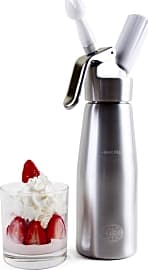
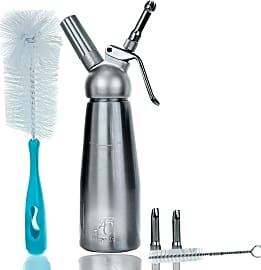
Cream whippers consist of four main components; a canister, a threaded cap, a charger sleeve, and a discharge trigger. To use a cream whipper, one must first place a liquid of some type into the canister. Then it must be tightly closed with the cap, which is nearly always lined with some form of gasket to ensure an air-tight seal. Then an N2O canister is placed into the charging sleeve, which can then be screwed into the corresponding slot on the canister's cap.
Next the canister should be inverted and the discharge lever can be squeezed.
When the charger sleeve gets screwed into the cap, the user should hear a slight hissing of gas as a hollow pin located at the center of the cap's threaded charger slot punctures the N2O cartridge. This allows the nitrous oxide to enter the canister where it dissolves into the milk fat to create a high pressure zone. When out of the canister, the pressure releases and creates the fluffy foam we all know and love.
One you are ready to dispense the liquid to be whipped onto your food, the canister should be shaken a few times to create homogeneously aerated liquid, but avoid over shaking as this can make the liquid too thick causing clogging when it is discharged. Next the canister should be inverted and the discharge lever can be squeezed. This creates a small opening, and since the canister has a higher pressure than the surrounding atmosphere, the gas will rush to escape forcing out the liquid at the same time.
Helpful Tips For Best Results
It is easy to make homemade foams, espumas, and whipped creams with cream chargers, but one may encounter issues if they don't follow a few simple tips. Before filling the canister with liquid, look inside it for a fill level indicator. Most will have a small line on the interior or exterior telling you how much liquid should be added.
If there is no indicator, check the product's instruction manual.
If there is no indicator, check the product's instruction manual. If you are unsure of the amount of liquid which should be added, it is better to use less than more. Over filling the canister can prevent proper aeration of the mixture at best and an explosion of the canister at worst.
Extremely hot and extremely cold liquids should not be used either. Chargers work best with cool to warm liquids as they aerate better. After the liquid contents have been fully aerated, they can be chilled in the refrigerator before dispensing if desired.
To prevent clogging, liquids should be strained before being added to the canister. The opening where the gas and liquid mixture is dispensed is very small and particles in the liquid can easily get stuck causing the entire unit to be clogged and unusable until it is thoroughly cleaned out, which means releasing the gas by unscrewing the cap, and often creating a big mess in the process.
If a mixture is not well aerated when being dispensed, try shaking the canister a few times and dispensing again. If it is still not properly aerated, you may try charging it with an additional N2O canister. If this still does not result in a well aerated mixture, the recipes needs to be adjusted.


